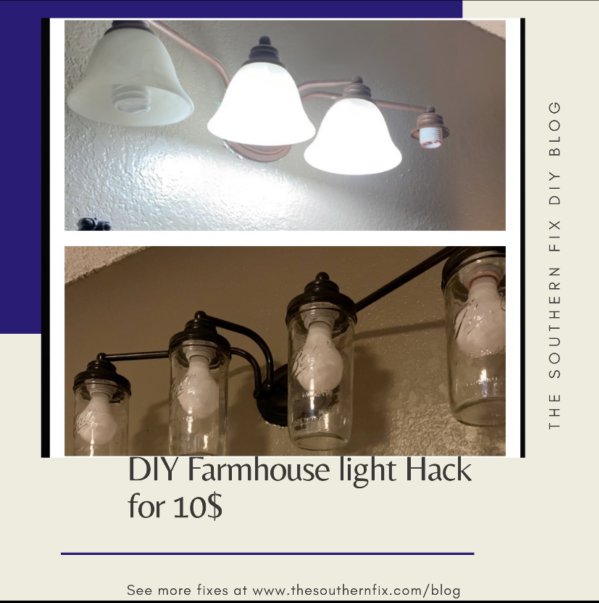
Looking for an inexpensive way to update your light fixtures? This easy DIY farmhouse light fixture hack will modernize your room’s look for super cheap! I used this hack to create a chic modern farmhouse look in both our bathrooms, but you can use this trick anywhere boring cookie cutter light fixtures have been placed. First, let’s gather your supplies. Below is a list of the items I used and alternatives you may want to use.
~ DIY Farmhouse Light SUPPLY LIST ~
- black or bronze paint which will adhere to metal or plastic- I used Rust-Oleum in matte black
- Mason jars- I used Ball brand because I wanted the Ball name on them, but you can use any cheap jars with a wide mouth and lids to fit over your light bulbs
- Edison Light bulbs for a vintage look- I bought a set of four at Walmart for 13$
- sharp scissors or tin snips- I used my old trauma nursing shears
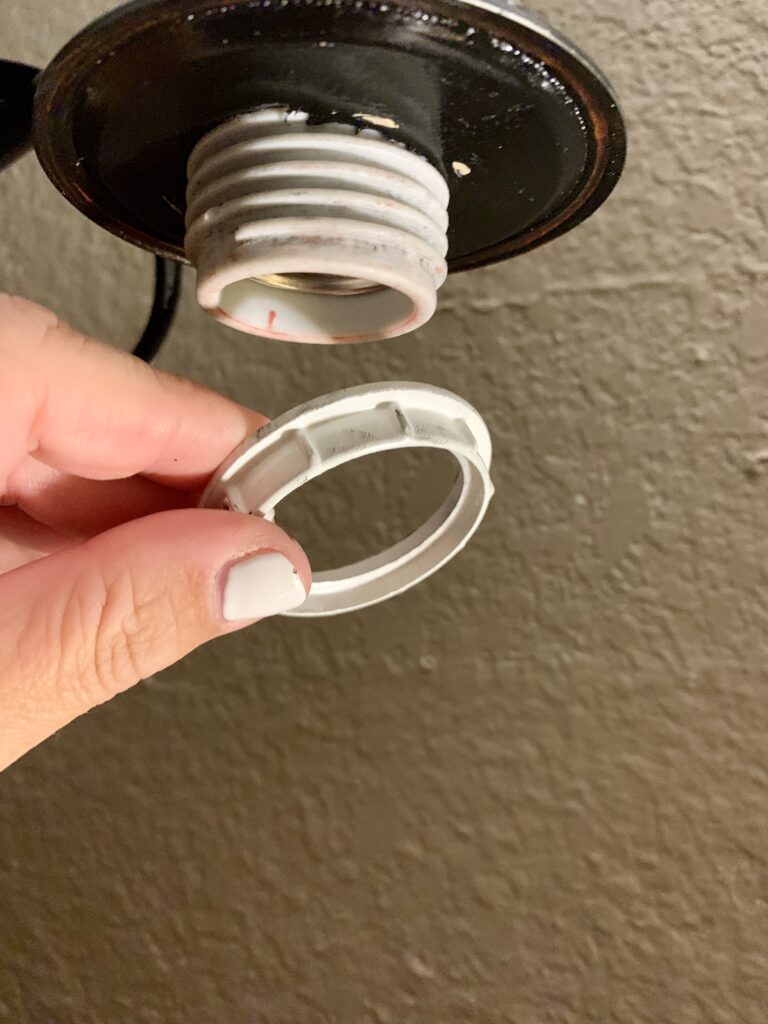
- If your light fixture does not already have a screw gasket/nut as seen in the picture to the right, you will need as many as light bulbs your fixture has
~ THE Step by Step PROCESS ~
The first step I took was to have my sweet cowboy take down the light fixtures for me. He knows how to cap the ends of the wires and not electrocute himself as I feared I might. If you have a steady hand, I suppose you could leave the fixture up and paint it while on the wall. I’m a self professed terrible painter, so opted to paint them off the wall. I used a metal paint because these fixtures are metal. I wanted a flat finish so I used Rust-Oleum matte black. I painted the entire fixture to modernize the look, making it more sleek.
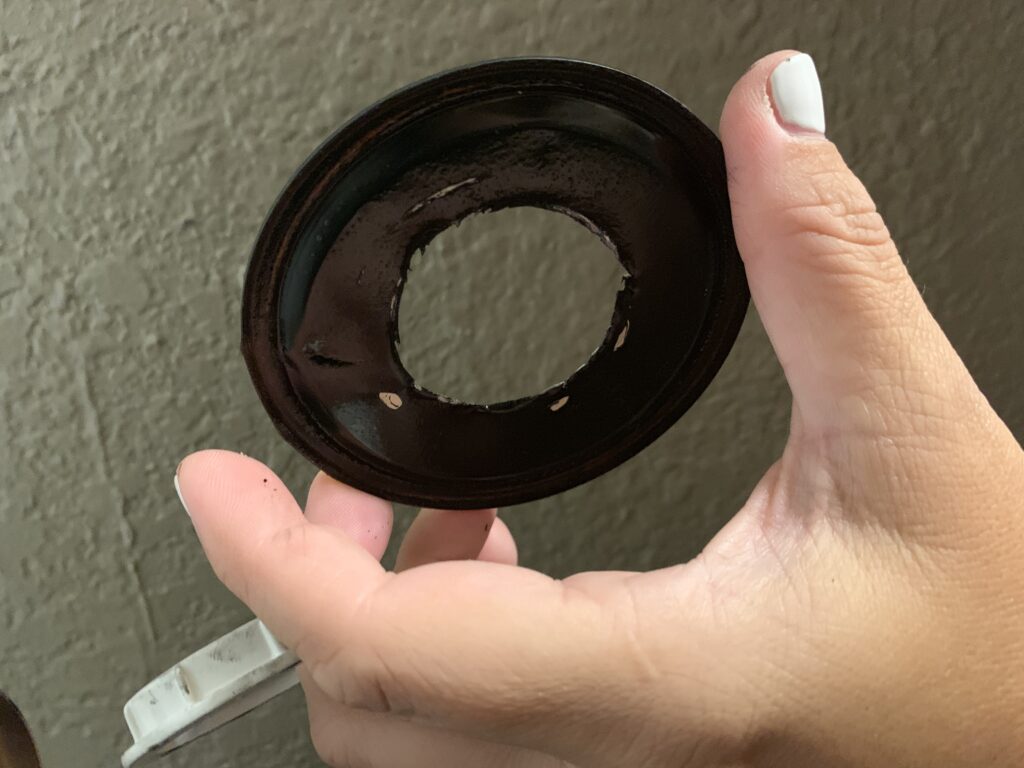
Next, I painted both parts of the mason jar lids and let them fully dry. Once dried, I used my trauma nursing shears to cut out the center of the lid. (Use whatever you have on hand, Tin snips would work as well.) I punched a hole in what I eye-balled as the middle of the lid. I then used lipstick, yes, lipstick, to outline the light bulb fixture size to know how large of a hole I needed. I pressed the lid up to the lipstick and got a rough outline of the circle. You can actually still see the lipstick on the right far end of the white light bulb connector in the very top picture. ( I did wipe if off eventually) I then cut out the circle.
~ DIY Farmhouse light Fixture Assembly ~

Now that you have painted the lids, the fixture and cut out your hole in the lid, you are ready to assemble the updated beautifully modern farmhouse fixture. This step has to go in order, otherwise; it will not fit properly. The first step is to actually thread the ring over the top of the fixture as seen in the picture (right). Next, thread the lid top you cut the hole out of around the light bulb holder and keep in place by then threading the screwed gasket/nut from the supply list. This will ensure the lip top stays put. Last, you can pull the ring back down over the fixture to rest on top of the lid plate.
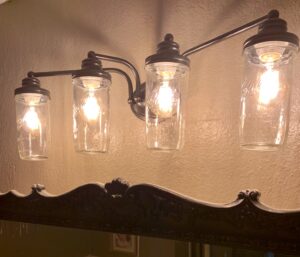
~ The Final Product ~
An important step to remember is to measure your mason jar mouth opening to ensure it will fit over the light bulb size you bought.
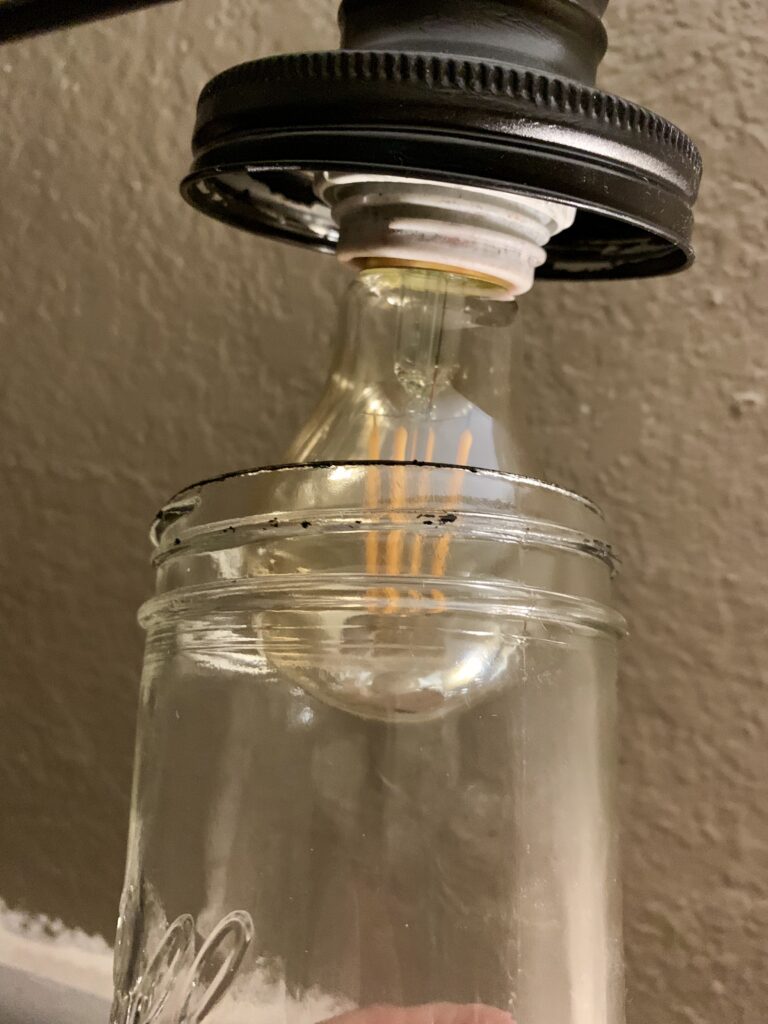
I actually went back a second time to the store to get a smaller size bulb for one of the bathroom fixtures because I could not fit the large Edison bulbs into the smaller mouthed jars. The last step is to screw in your Edison bulb and then screw the mason jar to the lid. Now stand back and admire your DIY Farmhouse light fixtures! How beautifully updated do they look now? I completed each bathroom fixture for under $20! What a steal!